Easy Guide To Remove W32/Phpw.QVD!tr
W32/Phpw.QVD!tr is responsible for causing these errors too! 0xf0825 CBS_E_CANNOT_UNINSTALL Package cannot be uninstalled., 0x8024600B WU_E_DM_CONTENTCHANGED A download must be restarted because the update content changed in a new revision., 0x8024200D WU_E_UH_NEEDANOTHERDOWNLOAD The update handler did not install the update because it needs to be downloaded again., 0xf080D CBS_E_MANIFEST_INVALID_ITEM invalid attribute or element name encountered, 0x000000CE, 0x80244013 WU_E_PT_INVALID_COMPUTER_NAME The computer name could not be determined., 0x8024001B WU_E_SELFUPDATE_IN_PROGRESS The operation could not be performed because the Windows Update Agent is self-updating., 0x80248016 WU_E_DS_DECLINENOTALLOWED A request to hide an update was declined because it is a mandatory update or because it was deployed with a deadline., 0x8024000D WU_E_XML_MISSINGDATA Windows Update Agent could not find required information in the update's XML data., Error 0x800F0922, 0x0000010D, 0x8024000C WU_E_NOOP No operation was required., Error 0xC1900208 - 1047526904, 0x00000099, 0x80246008 WU_E_DM_FAILTOCONNECTTOBITS A download manager operation failed because the download manager was unable to connect the Background Intelligent Transfer Service (BITS)., Error 0xC1900208 - 0x4000C, 0xf0800 CBS_E_INTERNAL_ERROR Reserved error (|); there is no message for this error
Method 1 : Start Your PC in Safe Mode With Networking
Method 2 : Removing W32/Phpw.QVD!tr From Control Panel
Method 3 : Stop Related Process To W32/Phpw.QVD!tr From Task Manager
Method 4 : Remove W32/Phpw.QVD!tr From Registry Editor
Method 5 : Remove unwanted extensions, add-ons, plug-ins from Internet Explorer
Method 1 : Start Your PC in Safe Mode With Networking
For Windows XP/Vista/7
- Go to the start menu > choose Restart option.
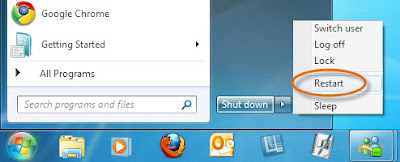
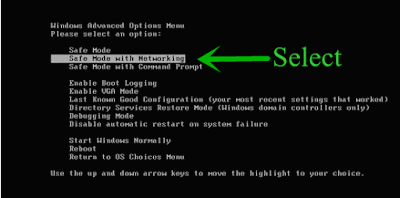
- Start pressing the F8 key once your PC become active.

- It will open the Advanced boot options on screen.
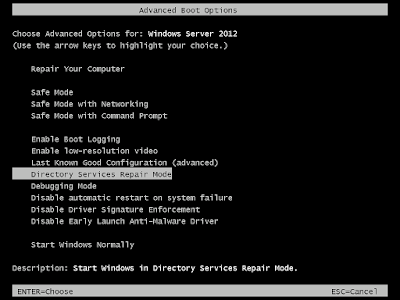
- Select Safe mode with networking > press Enter key.
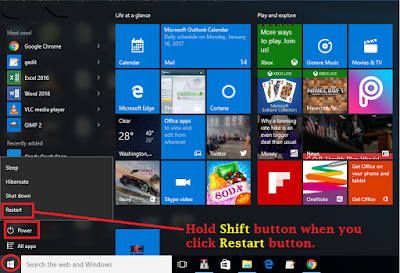
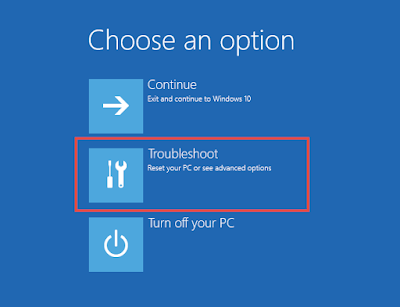
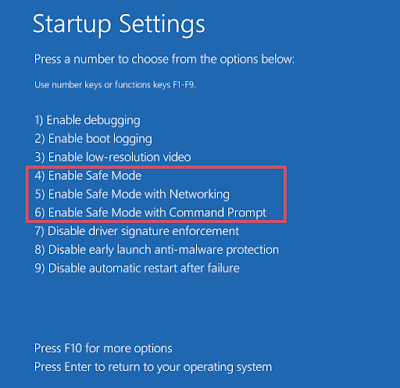
For Windows 8/10
- From your screen, press power button and click Restart.
- From choose an option Window, select Troubleshoot option.
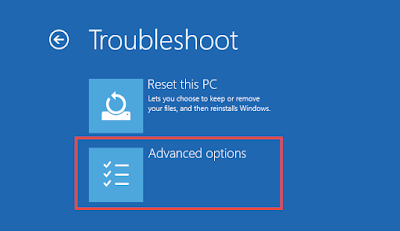
- Then click on the 'Advanced option.
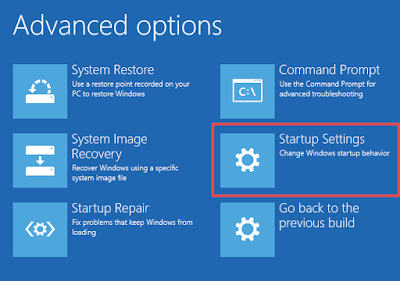
- After that select Start-up setting option.
- Select Enable safe mode > press the Restart button.
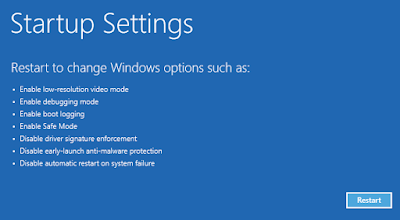
- In order to enable Safe Mode With Networking, Press F5 key.
Method 2 : Removing W32/Phpw.QVD!tr From Control Panel
Remove W32/Phpw.QVD!tr From Windows 7/Vista
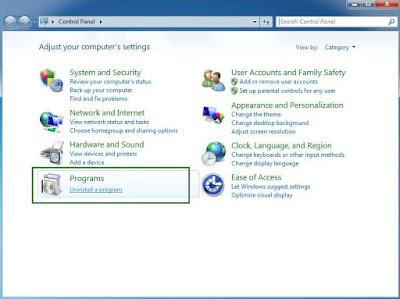
- Open the start menu and then select Control panel.
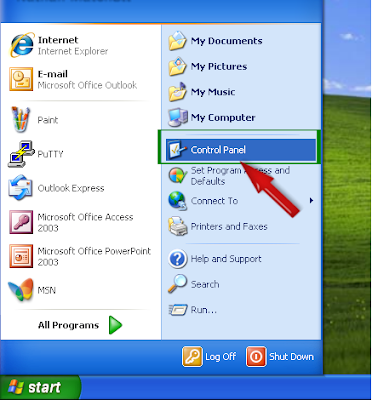
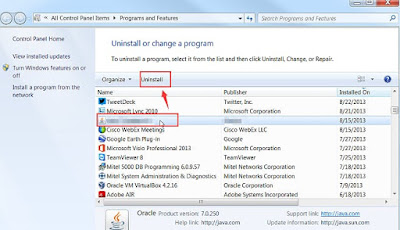
- From the Programs group, select remove a program option.
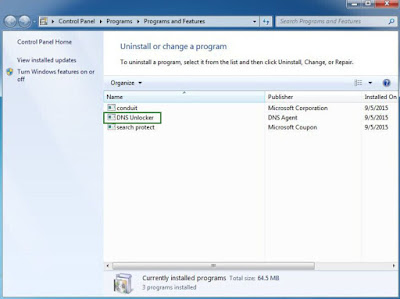
- Select W32/Phpw.QVD!tr related program > select uninstall/Change.
Remove W32/Phpw.QVD!tr From Windows 8
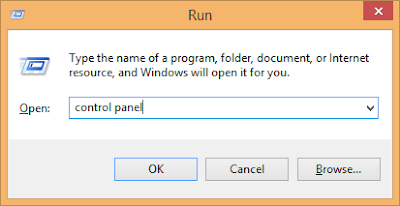
- Press the Win + R buttons at once to open the Run Box.
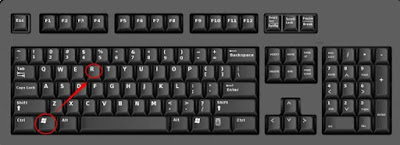
- In the Run box type Control panel and press Enter key.
- Click remove a program option under the Programs group.
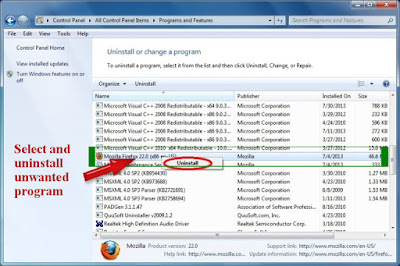
- From installed program select W32/Phpw.QVD!tr > click remove option.
Remove W32/Phpw.QVD!tr From Windows 10
- First click on Start button and select Setting option.
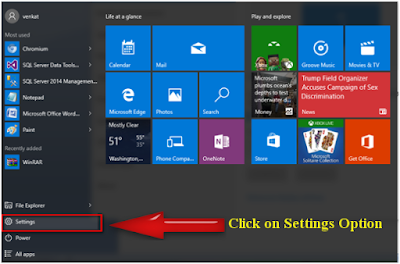
- From the settings menu, select the PC option.
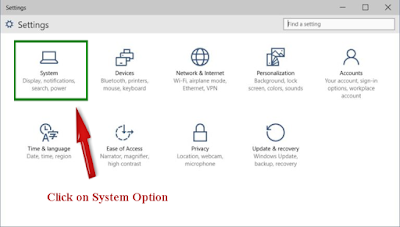
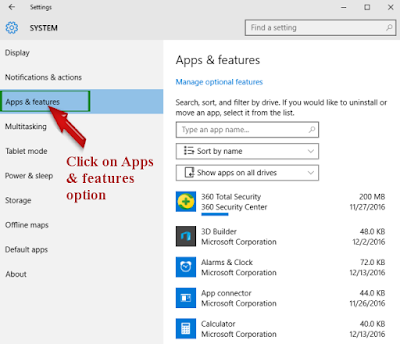
- Now select 'Apps & features' option from the left panel.
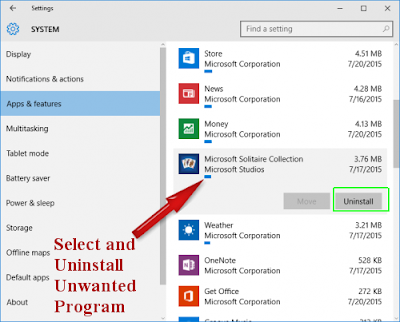
- Select keyword} related program and Remove them.
Method 3 : Stop Related Process To W32/Phpw.QVD!tr From Task Manager
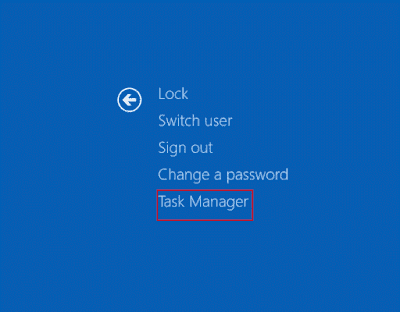
- Press the ALT+Ctrl+Del buttons at once.
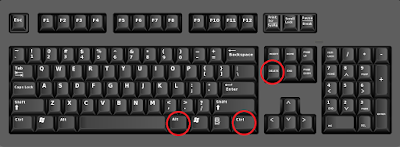
- Then select the Task manager option from the opened list.
- Select malicious or W32/Phpw.QVD!tr related process.
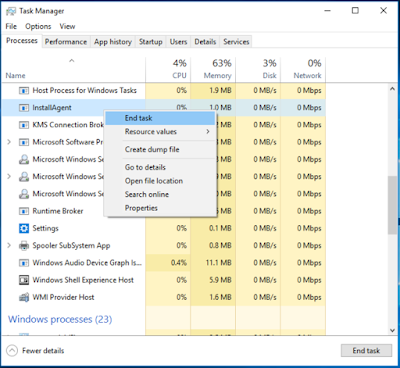
- Finally click on the End Task button.
Method 4 : Remove W32/Phpw.QVD!tr From Registry Editor
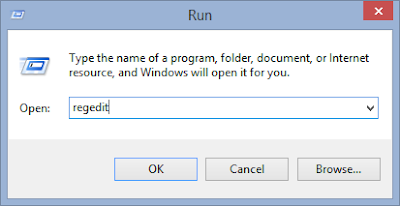
- Press Win + R button together .

- It will open the Run window on screen.
- Type regedit > click on OK button.
- Search for W32/Phpw.QVD!tr related registry and remove them.
HKEY_LOCAL_MACHINESYSTEMCurrentControlSetServicesWpm
HKEY_CURRENT_USERSoftwareMicrosoftInternet ExplorerMain ‘Default_Page_URL’
HKEY_LOCAL_MachineSoftwareClassesWin32.TrojanDropper.Vidro
HKEY_CURRENT_USERSoftwareMicrosoftWindowsCurrentVersionRun ‘.exe’
HKCUSoftwareMicrosoftWindowsCurrentVersionInternet Settingsrandom
HKEY_LOCAL_MACHINESOFTWAREMicrosoftWindowsCurrentVersionrunrandom
HKEY_CURRENT_USERSoftwareMicrosoftWindowsCurrentVersionInternet Settings ‘CertificateRevocation’ = ’0
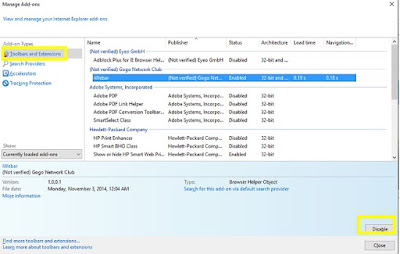
Method 5 : Remove unwanted extensions, add-ons, plug-ins from Internet Explorer
Remove W32/Phpw.QVD!tr From Internet Explorer
- First start the Internet explorer browser.
- Click on the Gear icon from right-top corner.
- Click on 'Manage add-ons' > select Tool-bars and Extensions tab.
- Search for W32/Phpw.QVD!tr related add-ons > click on 'Disable'
- If add-on can't be deleted then click on remove and click Close.
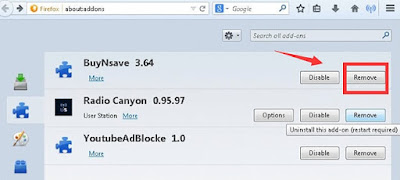
Remove W32/Phpw.QVD!tr From Mozilla Firefox
- Start Mozilla Firefox browser and go to menu
- You will get Add-ons Manager tab on your screen.
- In the add-on manager tab, select Extension or Add-on panel
- Select W32/Phpw.QVD!tr related add-on > click on remove button
- If the pop-up appear, click on Restart now option.
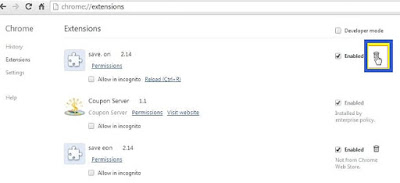
Remove W32/Phpw.QVD!tr From Google chrome
- Start the Google Chrome browser and click on menu button.
- Then click on the More tools and Extensions option
- Find out suspicious extension related to W32/Phpw.QVD!tr
- Finally click on 'Recycle Bin' to Remove unwanted extension.
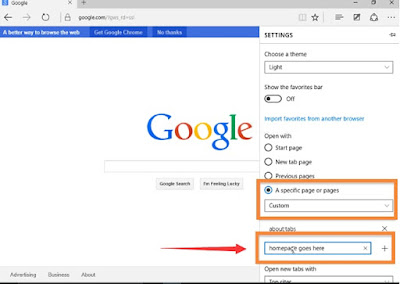
Remove W32/Phpw.QVD!tr From Microsoft Edge
Because there is no extension in the Microsoft Edge, hence you need to reset the browser settings to Remove W32/Phpw.QVD!tr.
- Open Microsoft Edge on your PC.
- Go to right top corner > tap on More (…) icon > go to Settings.
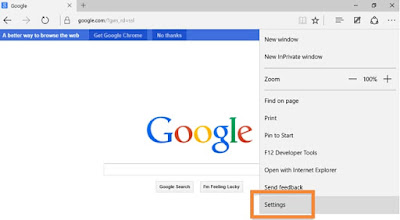
- Now select A specific page or pages from the Open option.
- Select Custom option > enter URL of your desired homepage.
No comments:
Post a Comment